Installing a Ruvati undermount sink can significantly enhance the aesthetics and functionality of your kitchen or bathroom. Renowned for their elegance, durability, and sleek design, Ruvati sinks are a popular choice among homeowners looking to elevate their space. If you’re contemplating adding this luxurious element to your home, you’re in the right place. This guide will provide you with a detailed walkthrough of the installation process, ensuring that your new Ruvati sink is set up flawlessly.
Contents
- 1 Understanding the Basics
- 2 Preparation Steps
- 3 Installation Process
- 4 Frequently Asked Questions
- 5 What essential tools do I need to install a Ruvati undermount sink successfully?
- 6 How do I prepare my countertop for the installation of a Ruvati undermount sink?
- 7 Is applying silicone sealant around the sink edge necessary when installing an undermount sink?
- 8 Can I install a Ruvati undermount sink without professional help?
- 9 What are common mistakes to avoid when installing my Ruvati undermount sink?
Understanding the Basics
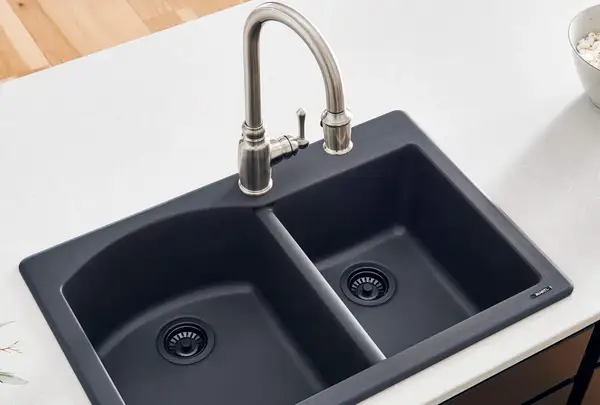
Before diving into the installation process, it’s crucial to understand what sets an undermount sink apart. Unlike traditional drop-in sinks, an undermount sink is attached beneath the countertop. This configuration not only offers a seamless look but also makes cleanup easier, as debris can be swept directly into the sink without getting caught on a lip or rim.
When it comes to installing a Ruvati undermount sink, there are several important factors and tools you’ll need:
Tools & Materials Required
- Tape measure
- Pencil or marker
- Silicone sealant
- Drill with appropriate bits
- Jigsaw (for cutting countertop if necessary)
- Clamps
- 2×4 wood pieces (for support during installation)
- Level
- Screwdriver
- Wrench
- Safety glasses
Ensure that you have all these items on hand before starting your project as being prepared will make the installation process smoother and faster.
Preparation Steps
1. Measure Your Space
Accuracy is key when it comes to installing an undermount sink. Carefully measure both the dimensions of your Ruvati sink and the countertop area where it will be installed. Ensure there’s sufficient space for mounting hardware beneath the counter.
2. Cut Out The Countertop (If Necessary)
If your countertop does not already have an opening that fits your new sink, you’ll need to create one:
- Place the template provided by Ruvati over the designated spot.
- Trace around it with a pencil or marker.
- Use a jigsaw to cut along the tracing carefully. Always wear safety glasses during this step.
Installation Process
Mounting The Sink
-
Apply Silicone Sealant: Apply a bead of silicone sealant around the edge of the cutout on the underside of your countertop.
-
Set The Sink in Place: Carefully lower your Ruvati undermount sink into position from below and press it against the sealant.
-
Secure With Clips And Wingnuts: Attach each mounting clip provided by Ruvati around the perimeter of the sink underneath the countertop using screws and wingnuts—tighten securely but do not over-tighten which might crack your granite or quartz countertops.
Using additional support during this stage is crucial—place 2×4 wood pieces across your cabinet base and clamp them down so they hold up the weight of your sink evenly as it dries.
Connect Plumbing Fixtures
Now that your Ruvati undermount sink is secured in place:
-
Reconnect any plumbing fixtures like faucets, supply lines, and drains that were disconnected during removal of an old sink or preparation for this new install.
-
Make sure all connections are tight but don’t overtighten plastic parts to avoid damage.
-
Use Teflon tape on threaded connections for leaks prevention.
Testing And Final Touches
After all connections have been made:
- Remove any supports used during installation.
- Clean up excess silicone from around edges where countertop meets sink for neat finish.
- Turn on water supplies and check for leaks thoroughly at every connection point—re-tightening where necessary.
Congratulations! You’ve successfully installed your stylish new Ruvati undermount sink following these instructions meticulously ensures not just aesthetic appeal but guarantees functional integrity lasting years ahead.
Remember, while DIY projects can be rewarding, don’t hesitate to seek professional help especially if plumbing isn’t within your comfort zone—it’s essential that these installations comply with local building codes for safety assurances hence always best practice consulting experts when doubt arises during do-it-yourself endeavors.
By adhering strictly to proper measurement protocols beforehand strategic assembly procedures outlined above achieving beautifully installed reliable kitchen bathroom addition becomes less daunting task seeming more achievable goal even those somewhat hesitant initially about taking such projects head-on themselves initially thought impossible before now demystified comprehensive clearly laid out step-by-step guide presented here today hope inspires confidence undertake very own home improvement ventures future too!
Frequently Asked Questions
What essential tools do I need to install a Ruvati undermount sink successfully?
To embark on the journey of installing a Ruvati undermount sink, you’ll require a selection of tools as faithful companions. Equip yourself with a tape measure, silicone sealant, clamps, a drill, possibly a jigsaw (for countertop adjustments), screws, and finally, an adventurous DIY spirit. Gathering these tools beforehand ensures you won’t have to pause your quest mid-operation for lackluster reasons such as missing equipment.
How do I prepare my countertop for the installation of a Ruvati undermount sink?
Preparing your countertop for the grand arrival of a Ruvati undermount sink involves ensuring compatibility meets elegance. Begin by confirming the dimensions; the cutout in your countertop should grace your sink with enough space to fit snugly beneath it – think of it as sizing Cinderella’s slipper but more sophisticated. Double-check measurements for precision since once cut, countertops don’t forgive easily. If modifications are needed, mark the area and employ your tools judiciously, keeping in mind that patience here is truly a virtue.
Is applying silicone sealant around the sink edge necessary when installing an undermount sink?
Absolutely! Applying silicone sealant around the edge of an undermount sink isn’t just necessary; it’s akin to sealing the deal on seamless integration and watertight security within your kitchen realm. Consider this step as drawing an invisible shield that prevents water from partaking in unsolicited adventures beneath your counter. Apply with confidence and precision, ensuring every nook is covered yet not overflown—a fine line between sufficient and excessive awaits your mastery.
Can I install a Ruvati undermount sink without professional help?
Venturing into the installation of a Ruvati undermount sink solo is indeed possible, provided you’re armed with determination, the right tools, and a comprehensive guide (much like this one). Consider this undertaking as embarking on an epic DIY quest where patience is tested and skills are honed. However, be mindful that some steps might require an extra set of hands or expertise—don’t hesitate to call upon trusted allies if you encounter formidable challenges along the way. Independence in installation is achievable but remember wisdom lies in knowing when to seek assistance.
What are common mistakes to avoid when installing my Ruvati undermount sink?
In the grand tale of installing a Ruvati undermount sink, several pitfalls await the unwary installer. First among these is neglecting precise measurements; remember, accuracy is king here and haste can lead to wasted materials or ill-fitting results. Another misstep is skimping on silicone sealant or incorrectly applying it—this ensures watertight integrity so treat it with respect it deserves. Finally, underestimate not the value of securely fastening your